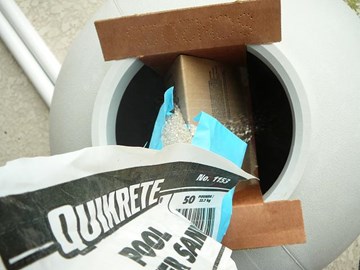
Every 5 - 7 years, you will have to replace the sand in your sand pool filters. The sand wears out. The sharp edges of the sand particles become worn and rounded and don't capture the contaminants. Also, the sand will start to ball up, or the water will create channels through the sand. You will notice that your swimming pool water is not as clean or the interval between required backwashes is shorter. This guide shows you how to replace the sand in your pool filter.
Click Here to View our Available Sand Filters
Click Here to View Replacement Sand Filter Parts


Paul Posted: 10/12/2014
Great directions. My sons and I did this in a little under 3 hours. Thanks for the article.Reply
InyoPools Product Specialist Dennis R. Posted: 9/15/2014
dirtywater - Check the spider gasket in your pool filter multiport valve. If it is damaged, you may be getting waste water leaking into the filter path.Reply
dirtywater Posted: 9/14/2014
I have an above ground pool. I also have a Hayward Pro Series Sand Filter. I used a flocculant in the pool to clear the cloudiness. I vacuumed to waste and noticed the dirty water being put back into the pool thru the inlet. What gives. Just installed the filter this spring after having a cartridge filter for 3 years.Reply
King Roy Posted: 8/1/2014
Very nice - thoroughReply
InyoPools Product Specialist Dennis R. Posted: 7/28/2014
sand level - I've see numbers for the free space above the sand range from 6" to 12". If you don't know what filter you have, I would go with 9" of gap.Reply
Anonymous Posted: 7/27/2014
I don't know how much sand to put in my filter. When we moved in the label on the pump was all ready gone so I don't know brand or cubic ft. Is 6in from the top of the filter a standard for all or most pumps?Reply
InyoPools Product Specialist Dennis R. Posted: 7/3/2014
System pressure - The gauge pressure for a Hayward S180T Sand Filter will vary with your system configuration - pump size, piping etc, but it typically runs between 10 and 20 psi.Reply
Anonymous Posted: 7/1/2014
what is correct gauge pressure for a hayward sand filter S180Reply
InyoPools Product Specialist Dennis R. Posted: 6/19/2014
BeckyB - Make sure that the clamp that holds the multiport valve to the tank is on evenly and tightly. Hit clamp gently with a rubber mallet as you are tightening the clamp. Check that there are no cracks in the tank or valve when they come together.Reply
BeckyB Posted: 6/18/2014
We just had the sand in our filter changed. We also had the o ring changed because it was leaking. It is still leaking after we did that. Why would it still be leaking? It is leaking from in between the switch and the tank. Please help I don't know what else it could be.Reply
ataloss Posted: 6/10/2014
I have read all the comments. but I still have a problem. I have nothing that came with my filter system that remotely looks like laterals. There are no pipes or anything like them inside my filterReply
InyoPools Product Specialist Dennis R. Posted: 6/6/2014
Sly - Most people don't have a place to recycle the sand. We generally place it out for the garbage in the bags the new sand came in.Reply
Syl Posted: 6/4/2014
Excellent instructions. I think I can do this. Stupid question. What do you do with the old sand? Recycle like old food compost? Or garbage bag it and throw it out?Reply
InyoPools Product Specialist Dennis R. Posted: 5/13/2014
jttoler - Make sure you leave at least 6" between the sand and the top of the tank. You may have a blown spider gasket. Are you using pool filter sand?Reply
jttoler Posted: 5/10/2014
was getting sand in the pool, discovered a crack in the centerpipe and laterals. Replaced the center pipe and laterals, followed all steps, and when I run the filter more sand than ever is coming through the return. anyone have any idea why this would happen? This is a hayward S180T932S sand filterReply
InyoPools Product Specialist Dennis R. Posted: 3/7/2014
Toniamcm - Sounds like everything's as it should be. The sight glass is only connected to the "waste" line so water will only show during backwashing - will be empty during filtering. 15 psi is a good reading for pressure. If your sand hasn't been changed for seven years, you are probably due for a sand change. It will improve filtering. Otherwise you can run the filter and pump as is.Reply
Toniamcm Posted: 3/3/2014
I have a Hayward filter. I am getting it ready for summer. Everything is working except the sight bulb doesn't hold any water when filtering. I am not losing prime, and I have back washed and rinsed several times. The bulb will hold water when backwashing. The pressure gauge is working, but shows only 15 psi pressure. The sand hasn't been changed for seven years, would this be the cause? Can I run the pump and filter like it is until I can get it fixed. Will this damage anything?Reply
susag Posted: 9/21/2013
My shop vac was not as effective as runninng a hose in the tank to make a slurry and just taking a 1" hose and start a sucktion and then letting it drain out. Just have to make sure the hose stays a fraction of an inch away from the sand.Reply
InyoPools Product Specialist Dennis R. Posted: 8/16/2013
sand in pool - Some sand has a fine sand in the mix that goes through the filter. When you change your sand, the "rinse" cycle usually clears this sand out of your new sand. But you are past this point. Try vacuuming the sand on the floor and purging it to your waste line. Also check your multiport valve spider gasket to make sure it is not damaged.Reply
Anonymous Posted: 8/13/2013
I have changed the sand and checked the latterals for damage but after restarting the pump for 6-8 hours the bottom of my pool has sand in it. I took the filter apart again and rechecked everything again and still have the same problem.Reply
Marge Posted: 7/19/2013
Well I decided to change the sand on my filter. Everything s perfect . All of the advise and comments and questions asked by others really helped do the trick with 100degree temp today it just worked out great!!!!!!!!!!!Reply
Marg Posted: 7/19/2013
I have Hayward model s166t sand filter. Filter water into pool good but backwash just trickling out should I change sandReply
InyoPools Product Specialist Dennis R. Posted: 7/18/2013
Laterals - The laterals I have seen have slots all the way around the circumference of the lateral. But if the slots on your laterals are only on one side, I do not think it will matter if the slots are up, down, or sideways. The water will get through them in any position.Reply
Anonymous Posted: 7/17/2013
Should the slots in the laterals be pointing up, down, or sideways?Reply
Anonymous Posted: 6/25/2013
I just replaced sand in jacuzzi filter. I was very careful to keep the tube resting on the bottom while pouring in sand. I'm unable to connect multi port valve to tube because of 1/2" gap between them. Can anything be done to avoid doing it all over again? Thanks in advance for reply.Reply
InyoPools Product Specialist Dennis R. Posted: 6/23/2013
loose filter clamp - Unfortunately, it sounds like you are going to have to remove the sand again to place the stand pipe further down in the tank.Reply
Anonymous Posted: 6/22/2013
Good day,my filter is leaking under the clamp, ive replaced the o- ring with no success. Ive called a pool company and they suggested that the pipe may have shifted, and to keep trying to get a good seal, or remove the sand and refill it?Reply
InyoPools Product Specialist Dennis R. Posted: 6/13/2013
pbivens - The filter manufacturers strongly recommend not trying to repair a cracked filter. There is a high risk of them exploding.Reply
pbivens Posted: 6/12/2013
I have a crack in the seam near the top of my older black composite material Hayward pool filter tried JB weld epoxy from outside and worked for one or two hours nowgoing inside, use JB again or something else??????Reply
InyoPools Product Specialist Dennis R. Posted: 6/10/2013
Changing sand - Some people purge the old sand through the filter drain. But you still have to pull the top off to add sand. Another option is to switch to a Cartridge filter. The cartridges are relatively easy to lift out, clean and replace.Reply
Anonymous Posted: 6/10/2013
this is a hard thimg to do if there is an eaiserway to change sand I want itReply
InyoPools Product Specialist Dennis R. Posted: 5/31/2013
Rich - It may be that your new sand is not yet "dirty" enough to backwash dirty water. Note: Your sand filter will filter more efficiently if it has some level of debris in the sand. Don't filter too frequently. Wait until your filter's psi increases 10 psi or so.Reply
Rich Posted: 5/31/2013
I just changed the sand in my sand filter (Hayward s180T) and started filtering my pool but when I back wash the filter the water is clear. I'm used to seeing dirty water that then changes over to clean after a few minutes. Any thoughts? ThanksReply
InyoPools Product Specialist Dennis R. Posted: 5/26/2013
Dave - Sounds like you have a blockage in your system. In the sand filter, check the laterals on the bottom of the pipe that runs through the middle of the tank. See if they are clogged. Then look at your old motor to see if your problem was a clogged impeller.Reply
InyoPools Product Specialist Dennis R. Posted: 5/24/2013
Mark - I had to talk to the filter rep on this one. If the filter cycle is working and there is no flow through the backwash and rinse cycle, he thinks your problem must be a blown spider gasket. If the water isn't going out the waste port at those settings, it has to be going somewhere. If the gasket is blown, the water is probably still going back to the pool. I would check to see if you have strong flow back to the pool in the backwash cycle. If so, you probably need to replace the spider gasket in your multiport valve. Remember to turn off your pump every time you change the valve setting.Reply
Dave Posted: 5/23/2013
I use my sand filter on my pond. The pump is in the collector box, which has a filter, and then is pumped through the sand filter. Last year the flow was fine. This year its a trickle and the motor burned out. It was 1/3 hp and a little small for the job. The sand is only two years old so wondering how to fix the trickle?Reply
Mark Posted: 5/21/2013
I have this exact filter and after completing these steps the backwash and rinse cycles barely flow out of the discharge. The normal filter cycle works fine. I opened the valve and found nothing irregular. The end of last season all worked fine.Any idea what might have happened when I replaced the sand, and how to fix it?
Reply
InyoPools Product Specialist Dennis R. Posted: 5/18/2013
6 bags sand - I just reread the installation instructions for this series of Hayward filters and it does say that 300# of sand is required for the S244T. In a statement for all models, it says "Sand surface should be leveled and should come to within 6" of the top of the filter tank". So it is not clear why your sand level is not at least close to the 6" line. I would add enough sand to get to the 6" line for best filtration.Reply
Anonymous Posted: 5/18/2013
Hayward S244T filter requiring 300 lbs of sand - Six 50 lb bags of quickcrete pool sand did not come anywhere near 6 inches from the top. Is this normal?Reply
Paul Posted: 5/14/2013
Excellent step by step instructions...you can't mess it up! I have a Super Clear filter. This was my first sand change ever, saved me a couple hundred bucks. When I turned it back on, no sand in the pool. The system seems to be running great. Thank you!Reply