How to Replace an Aquabot Classic Robotic Pool Cleaner Impeller

WRITTEN BY: 

  3.11 out of 5 stars on 9 ratings
(Click on a star to add your rating)

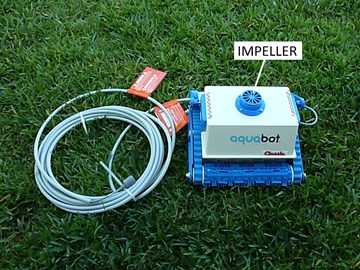
The Impeller on top of your Aquabot Classic Robotic Pool Cleaner provides the water flow for vacuuming your pool. During the season, it may become clogged or damaged and need to be repaired. This guide shows you how to access the Impeller to remove debris or replace it.

Step by Step

Top

Step 1

BUY IMPELLER - If you know that you have a damaged impeller, order it now so that it will be on hand for replacement.

Step 2

TURN OFF POWER - Unplug the Cleaner's Power Supply from the GFCI wall outlet.

Step 3

REMOVE TOP SCREWS - Remove the four screws that secure the Outlet Top.

Step 4

REMOVE OUTLET TOP - Lift off the Outlet Top to expose the top of the Impeller.

Step 5

CLEAR DEBRIS - Remove any debris that may have collected around the impeller. Careful. The blades are sharp.

Step 6

INSPECT IMPELLER - Inspect the edges of the impeller for broken blades or cracks. Make sure that the impeller does not rub on the side of the Bottom Outlet Ring. If the Impeller is operational, go to Step 22 to replace the Outlet Top.

Step 7

UNLATCH BOTTOM LID ASSEMBLY - If the impeller is damaged and needs to be replaced, you will have to remove the motor to get to the base of the impeller. Turn the cleaner over and unlatch the Bottom Lid Assembly. Just push the two latches, at the middle of the lid, off the lid.

Step 8

LIFT OUT BOTTOM LID ASSEMBLY - Lift the Bottom Lid Assembly straight up our of the cleaner.

Step 9

RELEASE FILTER SCREEN - To remove the Filter Screen that's over the motor, pry the two knubs away from the frame with a small screwdriver.

Step 10

LIFT OUT FILTER SCREEN - Lift the Filter Screen out of the cleaner body to expose the motor.

Step 11

REMOVE MOTOR SCREWS - To detach the motor, turn the cleaner right side up and remove 3 of the four screws in the Bottom Outlet Ring. Leave one screw in.

Step 12

REMOVE MOTOR SCREWS (2) - Turn the cleaner on its side and, while holding the motor, remove the fourth screw

Step 13

MOVE THE MOTOR - Flip the motor over so you can access the impeller.

Step 14

PRY OFF IMPELLER - INSPECT IMPELLER - The  Impeller is forced fit onto the shaft and will have to be pried off. Use a piece of wood that fits between the base of the motor shaft and the propeller and gently pry the impeller off the end of the shaft.

Step 15

SLIDE ON NEW IMPELLER - Place the new impeller onto the end of the shaft. Note that the impeller is slotted to fit over the flat key on the shaft. Make sure the parts line up.

Step 16

TAP IMPELLER DOWN - Using a hammer, gently tap the impeller onto the shaft until it stops near the base of the shaft.

Step 17

PLACE MOTOR INTO POSITION - Flip the motor back around so the Impeller pokes through the Bottom Output Ring.

Step 18

SECURE MOTOR TO FRAME - Turn the cleaner on its side and, while holding the Motor, attach the Motor to the frame with one or two screws. Turn the cleaner upright and screw in the remaining screws to secure the Motor securely

Step 19

TEST IMPELLER - Spin the Impeller with your finger to make sure it rotates freely.

Step 20

REPLACE FILTER SCREEN - Turn the cleaner upside down to replace the Filter Screen. Make sure the two end knubs drop into the frame holes.

Step 21

REPLACE BOTTOM LID ASSEMBLY - Place the Bottom Lid Assembly into the cleaner until the two latches click into place. Be sure that the Filter Bag is tucked in.

Step 22

REPLACE OUTLET TOP - Turn the cleaner right side up and secure the Output Top with the four screws.

Step 23

READY TO GO - Turn your Cleaner upright, place it in the water and plug it in.

Comments

Top
(1 to 3 of 3)

 Posted: 5/9/2019 

Very good and explanatory . My problem is my pump motor I need a new motor for aquabot classic A6001 ser 0611420 were I can get one
 Reply

InyoPools Product Specialist  Posted: 5/14/2019 

Hello Carlos - Unfortunately, we do not currently carry the Aquabot motors. We'd recommend contacting Aquabot directly. https://www.aquabot.com/
 Reply

 Posted: 6/20/2018 

These directions were absoltely spot on. My local pool repairman had the impeller in stock and I followed the directions step by step. I am now up and running great.
 Reply