Part # LPL-M-G-P
Dimensions 4-1/8" OD X 3-3/8" ID X 5/8" T
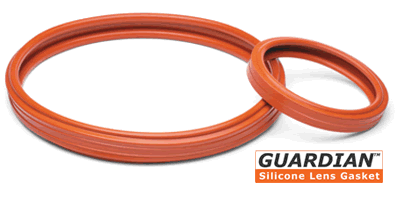
GUARDIAN SILICONE LENS GASKET FOR PENTAIR SPABRITE LIGHT
Introducing a line of replacement lens gaskets made for use with LED lamps.
Standard gaskets are only designed to last the 2,500 hour life of an incandescent bulb. The new Guardian Silicone Lens Gasket provides premium performance designed for use with any LED or incandescent lamp.
Guardian Advantages
Note: For use with Pentair SpaBrite light only
1 to 2 hrs
Screwdriver, Pliers, Socket Set, Towel
If you are handy with DIY projects, this is one you can do. Having LED lights in the pool and spa is a huge energy $$$ saver. We have our pool lights on every morning and evening now. Prior to this, we rarely used the lights.
NOTE: This light should NOT be used with a dimmer. This important information is not very obvious in the documentation.
1. Turn off power to pool lights at the breaker.
2. Layout tools on towel along the deck above the light niche.
3. Get in the pool (I will use any excuse to get in the water).
4. Unscrew single pilot screw at top of light niche.
5. Pull out light fixture and lay on towel.
7. Note location of screw and clamp holding lens in place (You'll want to reassemble it in the same position).
8. Use a socket set to loosen clamp holding lens and ring to fixture. Remove clamp, ring, and lens.
9. Remove old gasket, clean rim of fixture, replace with a new gasket.
10. Remove 500 watt bulb and replace with 35 watt color changing LED bulb.
11. Clean lens.
12. Turn power on at breaker, test bulb, turn power off at breaker.
13. Reassemble lens, ring, and clamp to fixture. Securely tighten clamp with socket wrench. Use pliers to take out some slack in the clamp ring, if necessary.
14. Set light fixture in water and test for air leaks. If a steady stream of bubbles appear, quickly remove the fixture and check the assembly around the gasket.
15. Wind cord around fixture and you return the fixture to the niche.
16. Align the fixture to the niche and replace the pilot screw to hold it in place.
17. Turn the power on at the breaker.
18. Test the light (See the directions for selecting the desired color setting or syncing with a color changing LED spa light).


The Most Recent Reviews
(5 out of 5 stars) Excellent Product, Service and Delivery
Reviewed By: PAUL P. ()
Pros: Product, Service and Delivery
Excellent Product, Service and Delivery
Was this review helpful to you?