How To Clean a Hayward DE Filter Grid Assembly

WRITTEN BY: 

  4.25 out of 5 stars on 12 ratings
(Click on a star to add your rating)

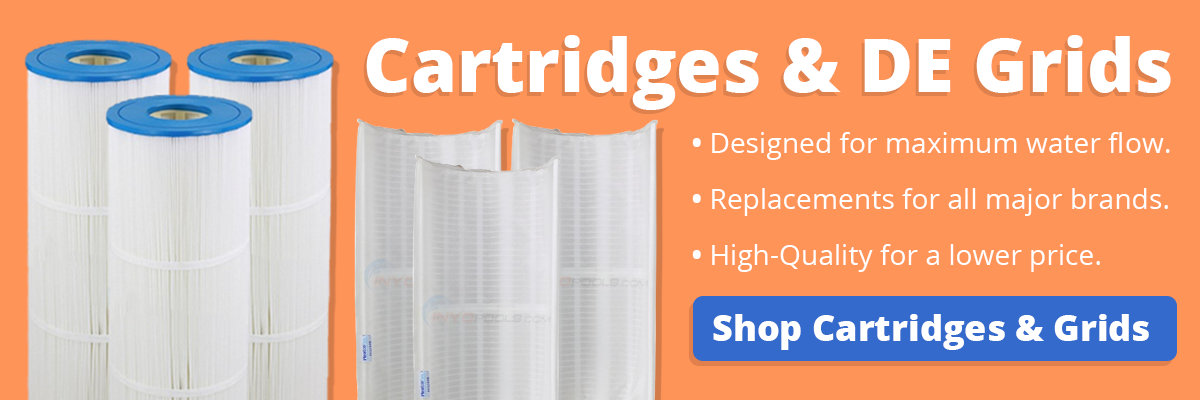
Periodically you have to clean the debris and contaminants out of your Hayward DE Filter. This process can be done at three levels: 1- by backwashing the filter; 2- by extracting and cleaning the grid assembly; or 3- by extracting and cleaning each grid in the assembly. For more information on Backwashing, see our guide on "How To Backwash a Hayward DE Filter". For a more thorough cleaning, you can extract and clean the grid assembly.  This guide discusses the procedure for this second level of cleaning the grid assembly. For the most thorough cleaning, you can pull the Grid Assembly and take it apart to wash down each Grid individually. This third level of cleaning is generally done once a year at the end of the season.

Things You'll Need

Step by Step

Top

Step 1

GATHER TOOLS - Pull together the tools you will need: a socket wrench, a large open ended wrench, silicon or Teflon based lubricant, a rubber mallet,  a face mask and a cleaning cloth.

Step 2

TURN OFF POWER - If your pump is on, turn it off at the power switch or ideally at the circuit breaker box.

Step 3

OPEN AIR RELIEF VALVE - Release the pressure in the filter tank by opening the air pressure relief valve at the rear of the pressure gauge.

Step 4

REMOVE DRAIN PLUG - Remove the drain plug to drain the filter. Insert a screwdriver into the slot of the plug to work as a lever if the plug cannot be removed by hand.

Step 5

VIEW CLAMP ASSEMBLY - The tank of this Hayward DE Filter is split between an upper and a lower section held together in the middle by a Clamp Assembly. To open up the tank, you will have to remove the Clamp Assembly.

Click Here to View Our Replacement DE Grid Packages

Click Here to Find Your Replacement Filter Parts (Gaskets, Manifolds, Cartridges, Housings & More) 


Step 6

UNSCREW HEX NUT AND BOLT - The Clamp Assembly is secured with a nut and bolt. Put a socket wrench on the head of the bolt and an open end wrench on the nut and unscrew the bolt. - counter clockwise.

Step 7

REMOVE HEX NUT AND BOLT - With the nut off, remove the bolt from the Clamp Assembly.

Step 8

LOOSEN CLAMP - The Clamp Assembly is pressed on tight. Tap one end of the Clamp with a rubber mallet to loosen the Clamp Assembly.

Step 9

REMOVE CLAMP - Take the Clamp Assembly off of the tank. Note there are two pivots or hinges on the clamp to help to remove or replace the clamp.

Click Here to View Our Replacement DE Grid Packages

Click Here to Find Your Replacement Filter Parts (Gaskets, Manifolds, Cartridges, Housings & More) 


Step 10

LOOSEN TANK HALVES - The two halves of the filter tank may still be stuck together. Take a rubber mallet and gently tap the top sides of the upper tank.

Step 11

LIFT OFF TOP HALF - Lift the upper tank section straight up off the grid assembly.

Step 12

VIEW GRID ASSEMBLY - This is a picture of the top half of the grid assembly. Note the 8 grids covered with DE Powder.

Step 13

HOSE DOWN GRID ASSEMBLY - To reduce the weight of the grid, hose down the grid assembly to strip off most of the DE Powder.

Click Here to View Our Replacement DE Grid Packages

Click Here to Find Your Replacement Filter Parts (Gaskets, Manifolds, Cartridges, Housings & More) 


Step 14

REMOVE GRID ASSEMBLY - Lift the Grid Assembly straight up out of the Filter Tank. As you lift it off, the Manifold Pipe on the side of the Grid Assembly should separate from the bottom pipe on the tank. Note how they line up so you can connect them when you replace the Grid Assembly.

Step 15

HOSE DOWN GRID ASSEMBLY AGAIN - Place the Grid Assembly on the ground and hose it down again. Spray down inside the Assembly as well and outside to remove as much of the old DE Powder as possible.

Step 16

HOSE OUT TANK BOTTOM - Hose out the bottom of the tank. The water and debris should flow out of the drain.

Step 17

REMOVE AND INSPECT TANK O-RING - Pull out the Tank O-ring laying on the edge of the bottom section of the Tank. Inspect to for cracks and wear. Replace if the Tank O-ring necessary

Click Here to View Our Replacement DE Grid Packages

Click Here to Find Your Replacement Filter Parts (Gaskets, Manifolds, Cartridges, Housings & More) 


Step 18

CLEAN O-RING SLOT - Clean off the slot where the Tank O-ring lays.

Step 19

REPLACE TANK O-RING - Replace the Tank O-ring.

Step 20

LUBRICATE TANK 0-RING - Lubricate the top of the Tank O-ring with a silicon or Teflon based lubricant.

Step 21

REPLACE GRID ASSEMBLY - Drop the Grid Assembly back into the bottom section of the Tank. Make sure the sections of the Manifold Pipe line up.

Click Here to View Our Replacement DE Grid Packages

Click Here to Find Your Replacement Filter Parts (Gaskets, Manifolds, Cartridges, Housings & More) 


Step 22

HOSE OUT TANK TOP - Clean out the top section of the Tank.

Step 23

REPLACE TANK TOP - Place the top section of the Tank back on top of the Bottom section. Make sure the Pressure Gauge is lined up so you can see it.

Step 24

SEAT TANK TOP - Push down on the top of the Tank with a rocking motion to help seat the Tank top.

Step 25

REPLACE CAMP ASSEMBLY - Replace the Camp Assembly starting with the back third and folding the two sides to the meet at the front. Make sure the clamp is positioned over both lips of the upper and lower tank sections.

Click Here to View Our Replacement DE Grid Packages

Click Here to Find Your Replacement Filter Parts (Gaskets, Manifolds, Cartridges, Housings & More) 


Step 26

REPLACE CLAMP BOLT AND NUT - Insert the bolt and begin screwing the nut on the end of the bolt.  Stop to adjust the Clamp Assembly when the nut becomes hard to turn.

Step 27

ADJUST CLAMP ASSEMBLY - Gently hit the Clamp Assembly around its circumference to seat the Clamp further. Retighten the bolt assembly. Do this adjustment a couple of times.  Make sure the final twists are snug but do not overtighten the bolt assembly.

Step 28

REPLACE DRAIN PLUG - Replace the Drain Plug at the bottom of the Filter Tank.

Step 29

CHECK MPV IN FILTER POSITION - Ensure that your filter's Multiport Valve (MPV) is set on FILTER mode.

Click Here to View Our Replacement DE Grid Packages

Click Here to Find Your Replacement Filter Parts (Gaskets, Manifolds, Cartridges, Housings & More) 


Step 30

TURN ON PUMP -Turn the pool pump ON and let it reach prime.

Step 31

CLOSE RELIEF VALVE - The Air Relief Valve should be open to initially let air out of the top of the filter. Close this valve when a steady stream of water shoots out the end of the valve.

Comments

Top
(1 to 21 of 21)

 Posted: 6/13/2021 

My Hayward filter doesn't have a drain plug.
 Reply

InyoPools Product Specialist  Posted: 6/17/2021 

What is the model number of your filter?
 Reply

 Posted: 3/4/2021 

Do I need to backwash or use the "waste" option after the filter is cleaned and the lid goes on? I've seen some videos that do, but not certain as to the purpose.
 Reply

InyoPools Product Specialist  Posted: 3/4/2021 

You can do a quick backwash or rinse before recharging your grids with powder if you think there may be debris that needs cleaning. It's not required, but it doesn't hurt.
 Reply

Anonymous  Posted: 8/5/2020 

How frequent if any should the filter grid be replaced?
 Reply

InyoPools Product Specialist  Posted: 8/20/2020 

When fabric or plastic skeleton starts to tear or break. To help lengthen the lifespan of the grids, I suggest giving them a chemical soak to clean the fabric's nooks and crannies once a year. How To Chemically Clean a Pool Cartridge Filter
 Reply

 Posted: 6/4/2020 

Any suggestions for removing a Hayward DE7220 grid assembly. It's very tall a too heavy to lift out of filter.
 Reply

InyoPools Product Specialist  Posted: 10/23/2020 

I'd give the grids a hose down to dislodge the old DE. The caked up DE can add a good bit of weight to the assembly. If the grid assembly is still too heavy, let the grids dry off to shed any remaining water weight.
 Reply

 Posted: 5/29/2020 

Dumb question - Will the pressure gauge "reset" itself after cleaning?
 Reply

InyoPools Product Specialist  Posted: 10/23/2020 

Yes, the pressure gauge will go back to its "clean" PSI after you have purged all the dirt and debris.
 Reply

 Posted: 5/18/2020 

Very good explanation, thanks
 Reply

 Posted: 7/18/2018 

Hello Edward - Try lubricating the o-ring again. When you're tightening the clamp, tap it with a rubber mallet. This should give you a better seal. It may be the incorrect o-ring or a defective o-ring if it continues to leak.
 Reply

Anonymous  Posted: 5/25/2018 

Purchased new o ring, installed it,as usual, turned on equipment and water Gushed from 2 halves of filter tank. Tried it twice, same result
 Reply

InyoPools Product Specialist  Posted: 7/7/2017 

Lxathome - If you see no change in the water pressure after cleaning the Grid Assembly, you may have to do a more thorough cleaning of each grid. See our guide on "How To Remove and Clean Hayward DE Filter Grids". If the grids are old, you might consider soaking them is a cleaning solution like TSP to get any stubborn suntan lotions or chemicals out of the fabric. If they are really old, you might consider replacing them. Also, check for any blockages in the return pipes after the filter.
 Reply

 Posted: 7/5/2017 

After cleaning grids tank pressure still at 30 lbs.
 Reply

InyoPools Product Specialist  Posted: 6/24/2017 

VictorNY - Pull the tank apart again and recheck the tank O-ring. if it is old, stretched or damaged, you should replace it. Also, check the small O-ring on the white standpipe (seen in Step 18). Make sure it is in place and not damaged. Then I would backwash the filter again and only replace 80% of the DE powder to see if that helps water flow. 20% of the DE powder is left in the tank after backwashing. You may have too much DE in the tank.
 Reply

 Posted: 6/21/2017 

Just cleaned my DE filter today. After replacing, I have very low pressure. Air infiltration from somewhere.
 Reply

InyoPools Product Specialist  Posted: 6/4/2017 

froggy47 - If your filter is that old, it probably has some corrosion build up on the surfaces. Try wiping the joining surfaces of the two pipes with a cleaner like CLR or TSP. to remove the buildup. You might ever use a fine grit of sandpaper.
 Reply

 Posted: 6/1/2017 

I just took mine apart (20 yr old). To clean. Every time I stand on the lower 1/2 "lips" and pull straight up. It ALWAYS hangs up on the "riser pipe" and I have to twist/pull/twist/pull with all my force to get it off. I am a strong guy.

I always lube that pipe connection & o ring. Is there anything else I can do to make it come apart easier?

I am gonna give myself a heart attack one of these times.

:)

 Reply

InyoPools Product Specialist  Posted: 7/24/2016 

John Garrity - No, I would not recommend using muriatic acid in your filter. If you are talking about the grids, it would be too harsh on the fabric. Use TSP instead - at your local HW store.
 Reply

 Posted: 7/22/2016 

Do you recommend the use of muriatic acid to clean a Hayward DE Filter? And how loose/tight should the filter body O-ring be?
Thanks.

 Reply